Learning Journal for 3D Modelling module: Creating & Designing a Character in 3D Max.
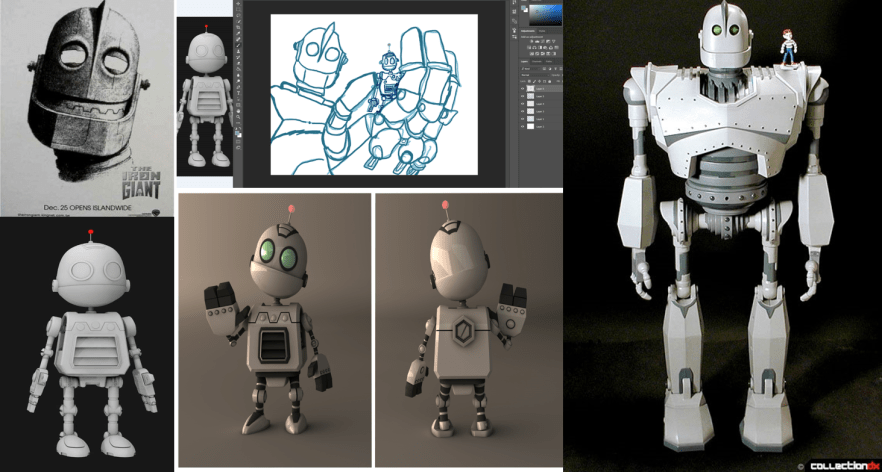
8/12/2016 Concept Art


The two images above are my concept art pieces for my modeling assignment. Mostly only concept art done so far but i have come up with the final concept which is basically a healthy mix of these characters:
Iron Giant:


Drix :


Clank:


To create my final model as mentioned above.
15/12/2016: Managing Assignment/ Organisation
I’ve started out by making a PowerPoint screen explaining each of my concept arts for the assignment. Each concept art is explained clearly with a clear thought process of how i got from one to the other and the reasoning behind it. I.e How i got from iron giant to a very simple robot design.

These are the texts below the images :
1st Concept:
This was my first piece of concept art. I did want to make my own version of the iron giant holding my favorite little robot Clank from the PlayStation series Ratchet and Clank. However I changed this concept because when I attempted to create this monster of a concept I just wasn’t able too. Due to my weak to non existing modelling skills. So I Went to my next concept which seemed much simpler.
2nd Concept:
Second piece of concept art. This was a much simpler version of my first idea. It also combined a lot of my favorite robots or robotic characters in my childhood. You got the iron giant style head, with a body of Clank and arms from Drix. This idea seemed much easier to complete in 3D max.
3rd Concept:
This was a very, very simple sketch of my third concept. With my lack of experience and my lack of confidence I had decided to make a super simple robot but having talked to my tutors I’m going to give my second concept a proper attempt.
As well as the concept arts and their explanations i also did mood boards for each concept. To show where i got the inspiration for each idea.
This is the mood board for the iron giant concept. Various pictures of the iron giant in different forms as well as Clank. There was also the size ratio between both of them that can be clearly seen in the mood board, I wanted that to show through. As you will see through the next few mood boards i still used a lot of inspiration from this original mood board, I however, just wanted to be able to make a model with my current modeling experience and this just wasn’t it.
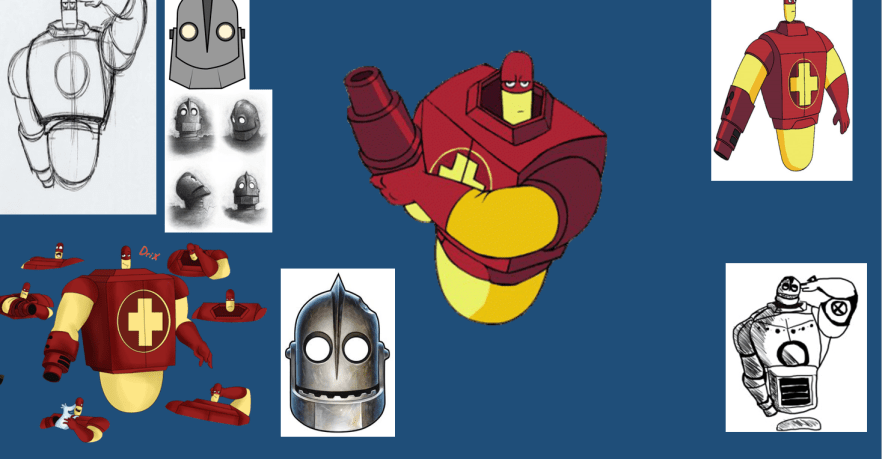
2nd mood board concept. Looks a bit less crowded than the first because i was starting to already get an idea of what i wanted my model to look like. I’ve always loved the character Drix. He has a good yet unique body shape that I thought would be fun to model in 3D Max. Also on this mood board you can see the the inclusion of more iron giant inspiration. This is because I still wanted to add the head of the iron giant onto Drix’s body structure as I thought it would look quite interesting as seen in my concept art for this mood board in the bottom right.
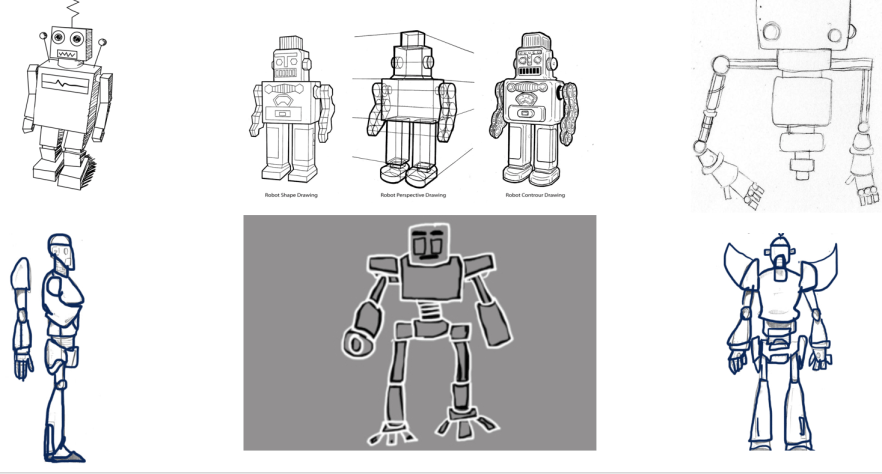
Mood board for concept three just mainly includes my attempts of making blue prints that I end up not using because they weren’t the best. As well as my very basic concept art. There are some images of other super basic robot ideas where i can get a simple but with great detail look at how i can create my simple robot. Since having a talk with my tutors I am going to give my second concept a try because it’s always good to challenge myself. I’m going to use the basic skills i learnt in class to try and create a futuristic cartoon robot.
3D Max :
After figuring out my concept, now came the fun part of starting to build the structure. At first I just wanted to try out making an robot arm structure. I used the line tool to make a basic silhouette in 3D Max in top view in the view port. I used the tools corner & edit spline to make the basic shape. Once the basic shape was created i used the lathe tool to make the complete shape.
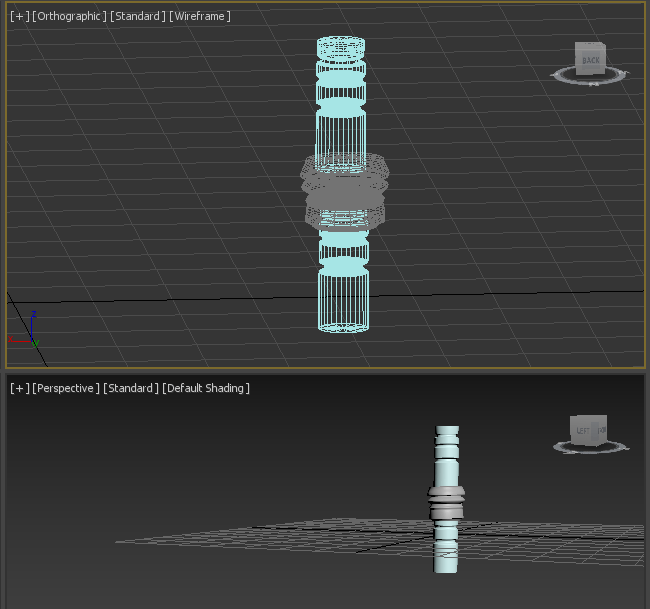
Simple basic attempt at creating a robot arm or any limb. Just wanted to try out to see what the end product would look like. Top image shows the limp in orthographic view so you can see the inside of the limb. This image consists of 3 parts that were created separately and then put together to create this limb effect or a giant straw. The bottom image is what the limb actually looks like. This was created last week after a few weeks of struggling to even start the assignment due to my lack of confidence in myself. (8/12/2016)

This is me just messing around with the view settings. I think this look pretty interesting. Looks very cartoon style. Thought it would be quite interesting to do this after I’ve finished my final character.
Head:
Today I’ve so far started working on the head shape for my model. I’m going to google how to cut into your object later but so far this is the basic head shape for the model. I’m quite happy with how this is turning out so far. I know right now it looks sort of like a top hat, but i have that flap piece so it can fit decently into his future body shape because if you look at Drix’s body shape is head is floating over his square type body with indents. I just wanted to keep the head simple before i try and over complicate it by adding the iron giant pieces to make it look more like the concept art for this piece.

1st type of head attempt
I decided i wanted to attempt place more detail into the head. Continuing with the theme of wanting to attempt to make my second concept. I quite liked the idea of giving my robot a visor/ sunglasses effect. I took inspiration from X Men and Star Trek for the visor effect as seen as below.


This is what my head now looks like as seen below, looks a little like those fire hid rents you see in cartoon shows. The sticky out bits on the sides of the head are the laser pointers of the visor/sunglasses. The sunglasses or visor devise goes across the robots face all around so its more like a visor mask or sunglasses mask onto the head. If we were gonna color/ paint these then the handles would be black with the front being red with darker red shading.

2nd head detailed with visor and sunglasses effect with the side wings as laser pointers.
The next part of the model i worked on was the body. I was overall happy with the head and decided to leave it alone. With the body attached I’m getting a bender vibe from Futurama as seen below.
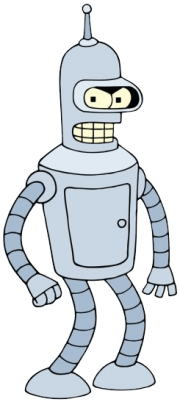
Bender – Futurama
Edited Head and Laser Headset Updated
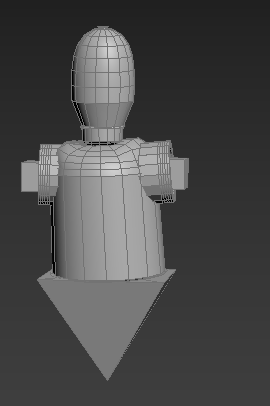
Here’s a screenshot of what my model looks like currently. Still not sure about keeping the weird looking flat piece. But if i can make it go up and in then it might look a bit better. Or ill get rid of it to make more of a Drix shape as seen above. I need to bulk up the body a bit more but that will come when i add more details to this very simple body structure.
I added a new feature to the body that i hadn’t thought about to add. Whilst i was removing the flat surface it formed a shape that looks like there could be room for capes. I know Edna in the Incredible’s movie when she said ” No capes!”. I gave my robot character a cape because it suited it. If we were going to paint this piece then the cape would either be red or black with little golden pieces holding the cape the the metal framing.
Body model with cape attached

Close Up of Cape
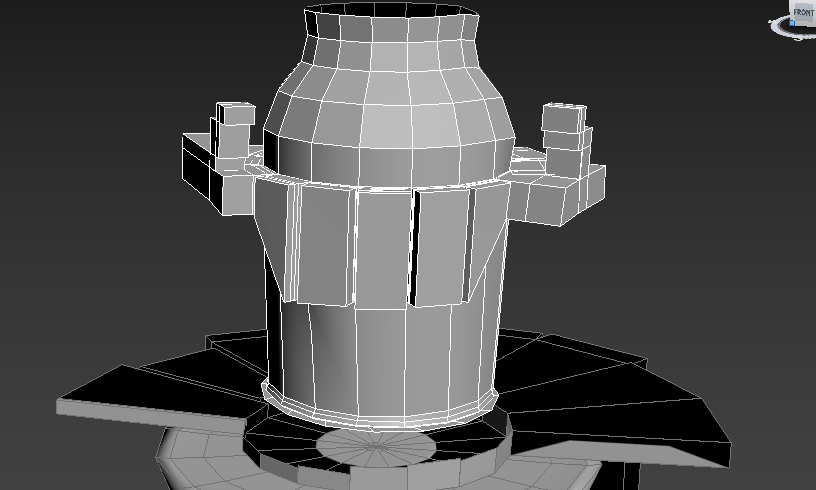
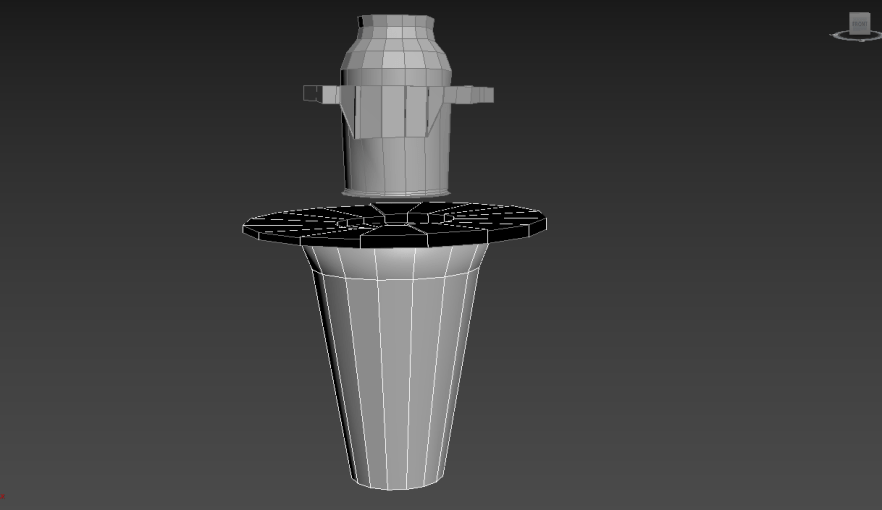
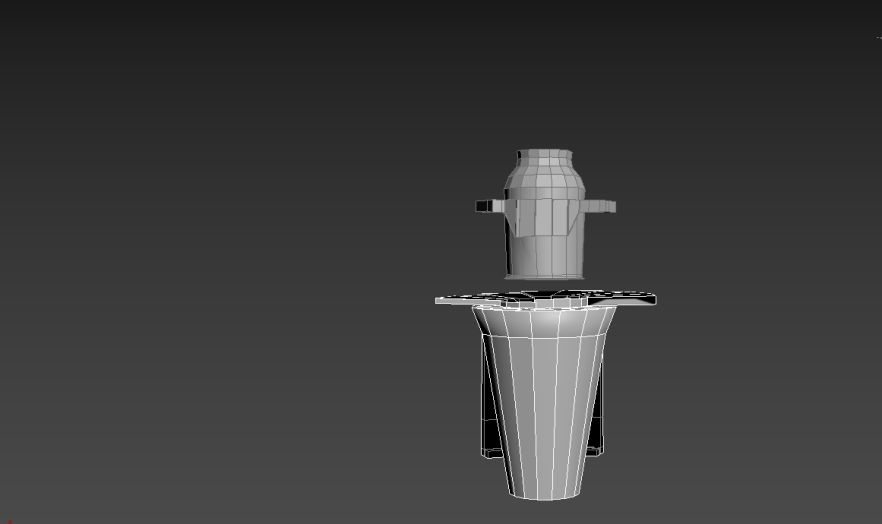
As well as sticking with my concept art. I have added that little circle that gives the robot it’s floating or hovering effect. The robot is finally beginning to take its form. I’m happy with how good this looks.

Current progress on robot
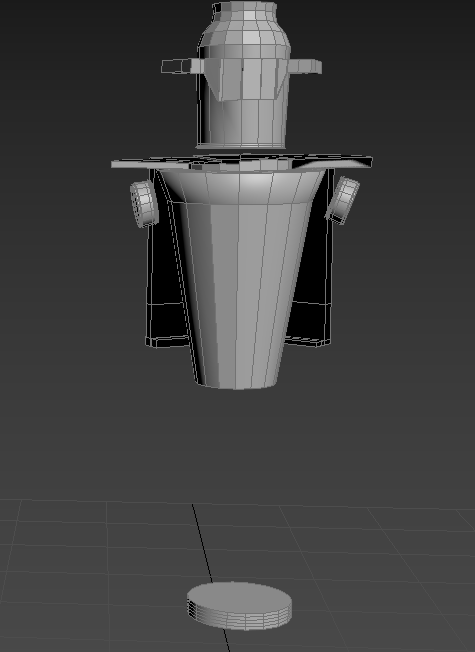
In the image above I’ve started to add the areas i want the arms to come out and grow into arm blasters that are similar to that of Drix’s or any fighting robot. Right now I’m happy with the overall scale of the robot the arms i might need to adjust to fit the bulkiness of the blasters that I will be attaching later on in the build.

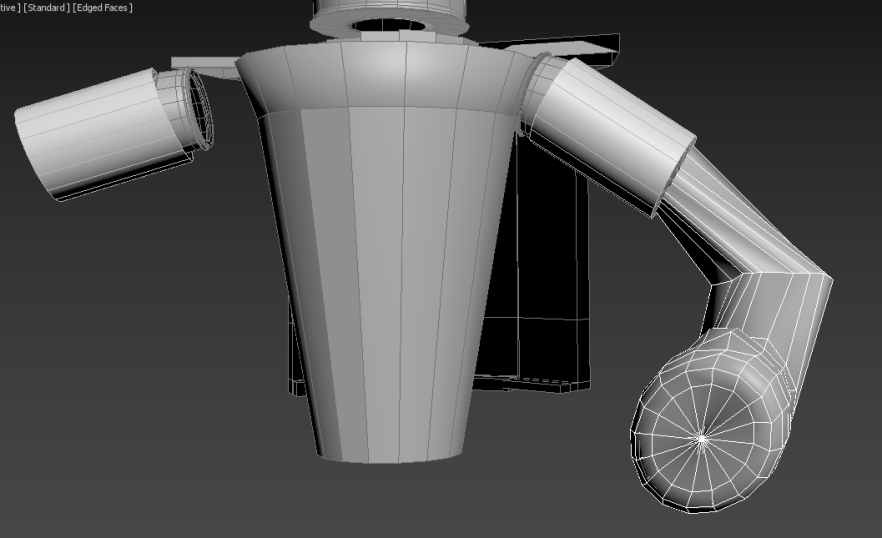
Starting of the arms to attach blasters
The image above shows the starting’s of the arms which will lead down to the blasters. The arm extenders are similar to that of Peridot from Rebecca Sugar’s Steven Universe. She is a gem who is naturally small but uses arm and leg extenders as her tools. This is represented well in the photo. Her arm and leg extensions just seem to click into place. Much like my current robot’s arms are looking. The arm sockets click into place with the arm extenders to get ready for the arm blasters.

Inspired by Peridot I have decided to create one arm with the blaster and one are with a hand similar to the likes of hers. As seen below.
Right Arm of character will have fingers looks like Peridot arm extenders.

Robot Fingers
Once i was done with the constant rotation and scaling of the arm and hand i went on and created the robot fingers for the right side of the robot. These hands and fingers would be good for grabbing onto things or in which Drix does to hold his blaster cannon. I made the fingers just by extruding different rectangular pieces. This is the finished right arm so now I’m going to start working on the left which is the blaster cannon.
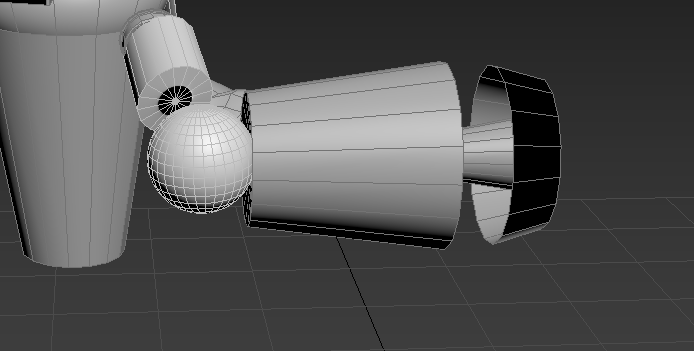
Left Arm Blaster Structure
I began with the structure of the left arm which will be the blaster to this robot creation. I used the arm extender from the other arm and placed a sphere in the middle to bridge the gap between the arm extender and the blaster itself. There’s a few more little details that need to be added to the blaster before it’s finished but this is just the basic structure of the left arm and blaster.

Full Body with Arms Structure
This is a full body snapshot of what the model looks right now. It’s almost done I Just need to create the little tertiary details to the body and the blaster cannon. To make the robot complete.

Close Up Of Blaster and it’s Tertiary details
So the above image is the finished left arm and it’s blaster. The little ball shape is where the laser could come out of, I designed it this way so if the robot wanted to shoot out a huge blast the ball would contract back into the arm which would give the robot the ability to have a huge damage on it’s victims.
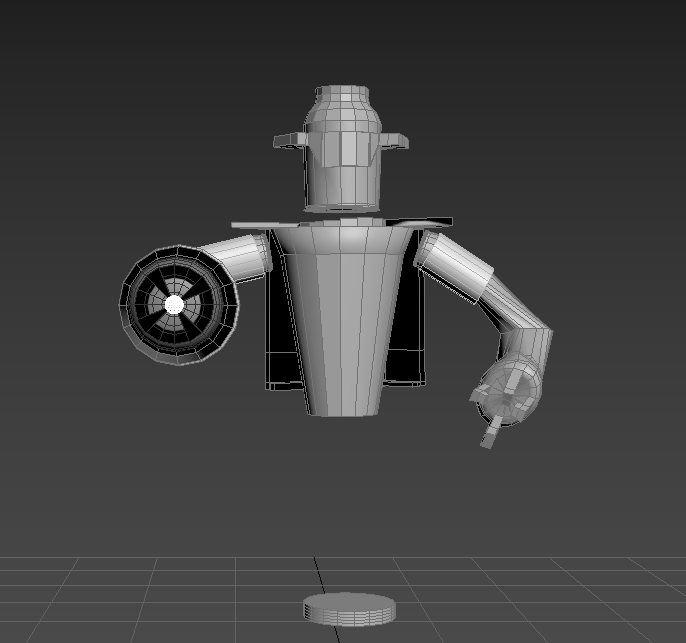
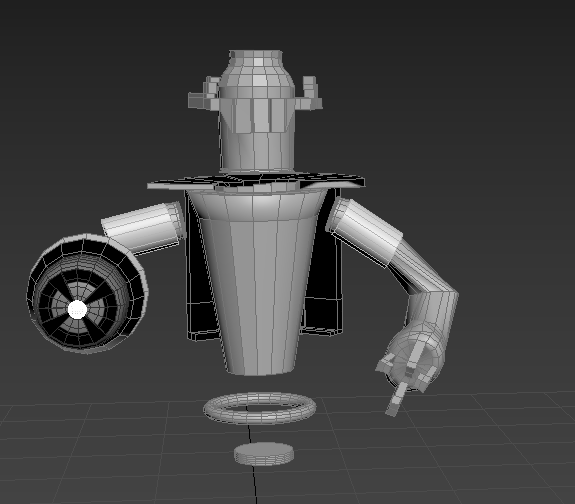
Finished Robot 15/12/2016
The image above shows the finished robot. It ended up looking like a good mix of my 2nd and 3rd concept with some cool added characteristics to the final product. If i were to paint this it would be a very detailed paint job. With a lot of intricate colors and shading. But overall i’m very happy with the outcome of this robot. All I have left to do is create either a weapon or car but i might just create a little friend for the robot to have, like i mini sidekick. I will start my concepts for the next item I’m going to add with the robot.
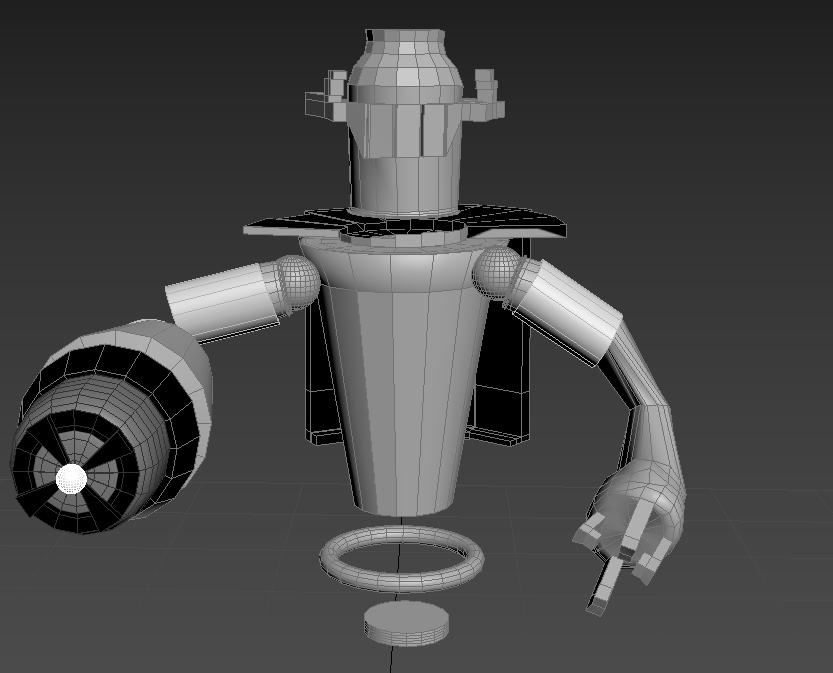
Updated Finished Version

Process from Concepts to Final Product
The image above is there to show the types of ways that the concept art has led to the creation and building of the final robot. Saying 1+1= the final product is a simplified way of explaining how I took pieces of one idea and added to another as well as adding other characteristics to the final product.
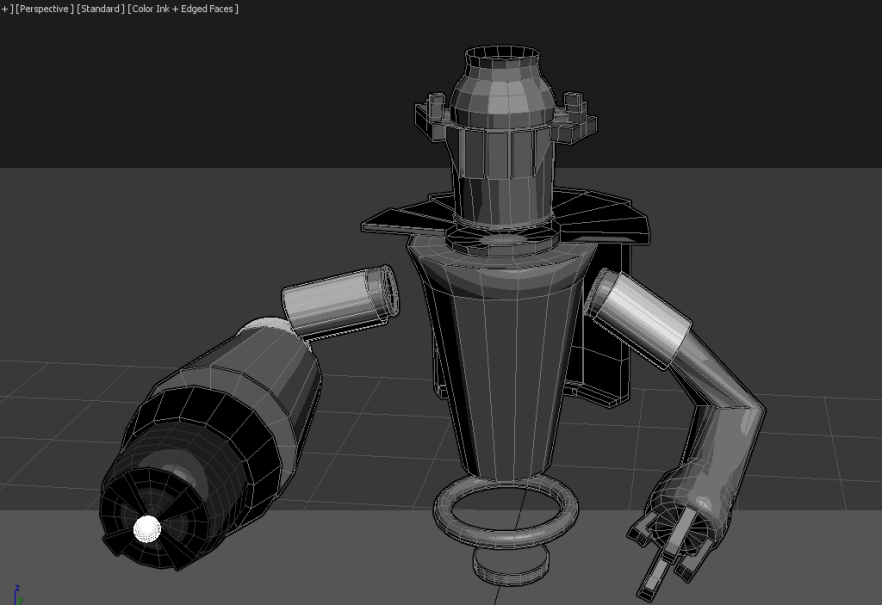
Finished Design in Color Ink and Edged Faces
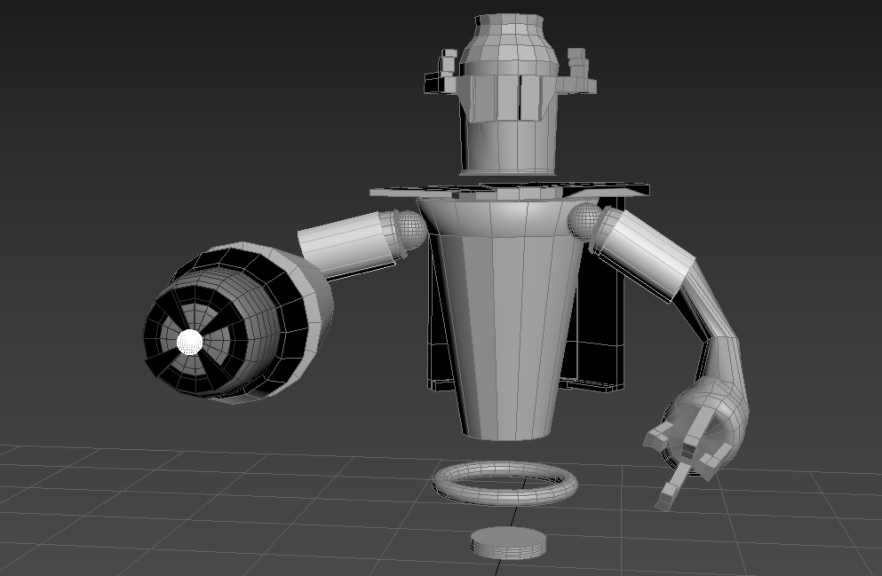
Gave the Robot Shoulders Balls
Edited Size of The Shoulder Balls
12/01/2017
Updates:
After being away from the task for about 2 weeks due to the holidays I’ve decided that the right handed needed to be deleted and replaced with the copied version of it’s left arm it just adds to its character a lot better. Even though looks identical to the left, visually yes, but if I were to put this into a game his right arm could do so much more than it visually looks to do. This would add character to the robot. His arm can go from the standard blaster to a retractable hand. This would also make sense because having two blasters would be inconvenient for this character. A weakness if you will, that’s two easy places for his enemies to hit causing catastrophic damage or even death to this robot.

Blaster added to right arm.
As well as adding blasters to both arms I’ve added a cap to his head. I since speaking about his weaknesses if he wasn’t able to have a working arm i realized his biggest weakness is the fact he practically has a large hole in his head. He is the definition of “Air Head” “nothing going on upstairs”. So i just cloned a sphere from his shoulder joints and placed it carefully into the head space. So now it looks like he has a head cap or a small brain but it’s simply just a sphere in his head to fill the space. I was going to add “jet packs” to his back but he’s already “floating” as suggested by the rings below to represent that he’s indeed floating, I’m sure there is a better way to show this but right now this is all i know how to model in 3D Max. 
Second Character:
I’ve finished the first model now i have to create the second. I could of done a weapon but he’s robot with built in weapons so there was no point. During the winter break i saw Star Wars’s Rogue One movie. It was really good and the CGI in the movie was intense but also great added a lot of character to the movie literally. So i got the idea for my second character from my favorite Rogue One Character K2S0 who is this sarcastic full of life robot who almost reminds me of the popular C3PO in the Star Wars Saga. Sarcastic and Sassy as this robot is i’m going to try my best not to recreate him but to try and make a mix up of K2SO, C3PO and the adorable R2DT.

K2SO – Rogue One Star Wars Movie
The image above is the current updated version of the second robot inspired by K2S0 from Rogue One. I’ve created the torso and the pelvis of the robot. I’ll go back and add the Tertiary details to the face and the arms once I’ve done the legs and feet. So far it’s modeling well. After the break I’ve gained some self confidence over my abilities I’ve accepted I’m not going to be as good as the people in my class but if i do my best then it’s all i can do.

Hips added to pelvis
I’ve added hips to the legs all ready for legs and their leg extensions to be ready for the attempt at building the robots feet. I created the left shape by using line and then creating a lathe once i got the scaling correct and positioning i then cloned it to be able to place it on the right hand side. So far the model is taking shape much quicker than my 1st model.

Added a Middle Section

Legs Added
I added his middle section to extend his body from his torso. No legs added yet just the two small leg extenders that will be knees for robots. Right now it sort of looks like a small child robot or doll. Now I’ve added the legs using an extrusion of the knees into three pieces then scaled and edited them to look the way i wanted. Now i need to make the ankles before tackling the shoe or feet of this robot.

Feet and Ankles Added
I added the feet by creating a box shape and placing it just behind the where the leg ended. Once it was in place i extruded it a couple of times ending up with a foot/shoe type object all ready for me later to add Tertiary details.

Trying to Figure out how the arms are going to look
In this screenshot I’m trying to figure out the layout for the arms. Right now it’s just looking like random blocks put together. Not sure if i want his arms by his side or stretched out.

Arms Added
Arms have been added. They were kind of tricky but managed to put them correctly into place. The model is finally taking shape the only other main piece that needs to be added is the hands and fingers. I might attempt to make a blaster but it depends mainly on how the hands are looking.

Hands/claws
I’ve successfully added and created hands. They are like claws sort of similar function as a forklift.I was going to place a blaster but it should wouldn’t of made sense functionally due to the size of his arms in comparison to the other robots blasters.
The Final Render of each character model – 19/01/2017

Front Full Render of Character Model One

Side View Render of Character Model One

Back/Rear View of Character Model One
Renders of Character Model Two

Front Full Render Of Character Model Two

Side View Render Of Character Model Two

Back/Rear View Of Character Model Two
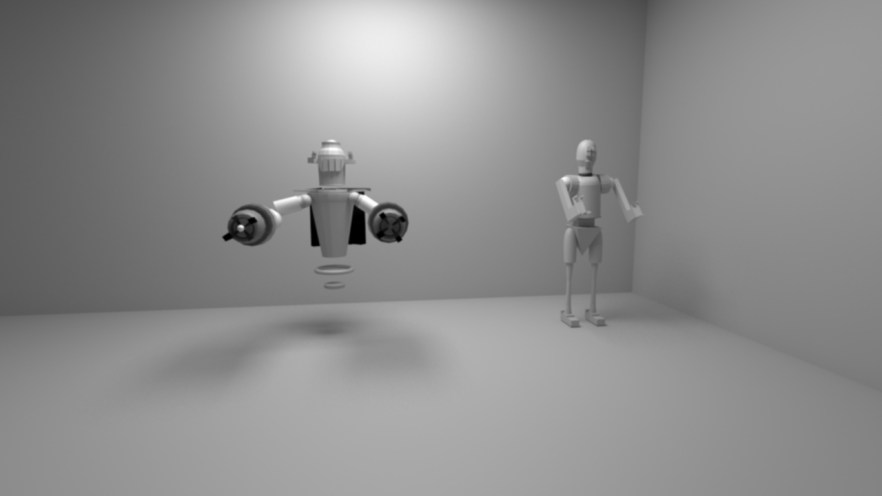
Fancy Professional Render of Final Piece
Conclusion/Summary of Assignment:
The overall conclusion to this assignment is that I think goals are good, but being realistic is better. My initial concepts and ideas were something i wasn’t able to achieve so I had to aim a little lower. Instead of my original idea to make a ratchet and clank reverse meets iron giant. I want to make a simple yet detailed piece that portrays a iron giant type clank with a ratchet type creature i had no choice but to make a much more simpler version. Thus creating the characters above. The first attempts at 3D Max and modeling ended up with a character looking a lot like those bowling ball type robots as seen in the Incredible’s movie by Pixar. Much after a lot of confidence issues i managed to gain the understanding that I needed to just push myself to get a better understanding of the 3D Max software. Though it was a challenge I eventually decided to stick with my robot idea. I made the first robot by using the Lathe tool and a lot of extruding, same processes went into the second robot. Originally I would of liked to of just made one robot and a weapon or vehicle but I just didn’t have the know how to make either of those and that’s how the C3PO and K2SO inspired robot was “born”.
I do however, like how both of these character models turned out. Looking back at my first model after currently playing the Insomniac Games’s Ratchet and Clank games I personally think my first model would fit in perfectly. Almost reminded me of one of the Blarg robots that are used to try and destroy the Galactic Rangers. After realizing that i noticed that my first character model wasn’t that bad. I became quite proud of how it turned out. I personally love the style of this character. Looking at my second character it’s also a good example of how much I know about 3D Max, also quite happy with it’s turn out. Not as good looking as my first I would need to work on that in the future for other assignments to not just have one piece looking great and the other to suffer.
My models are a good example of my skills set for my current state for 3D Max. Most of my models are made from the Lathe Technique which i learnt in class. Which in class had used to make cups. The tool helped out a lot when creating the most weird yet interesting shapes of my models are by creating the lathes then extruding and beveling them to look the part. In conclusion, I went for a more simpler idea but it turned out to be the best idea because it looks good. I put a lot of effort into my character models and i would like to once again in the future as i mentioned to try and create my original idea.
I tweeted my favorite game developers/game company Insomniac Games saying that my 1st model was inspired by their game Ratchet & Clank and they actually replied. 
Link To Work:
(proposal)
https://drive.google.com/file/d/0B7EvKxnm2o40TGhTZERlbnQ5SG8/view?usp=sharing
(Final Models)
